
A reader asked me the other day how I added the dark feathered border to my photographs, so I thought I would write about it today.
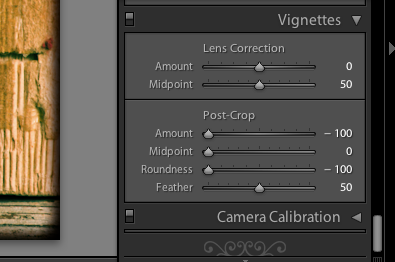
I usually use my Adobe Lightroom 2 computer program and simply use the options under "Vignettes" to add my desired border.
However, if you don't have Adobe Lightroom 2, you can use Photoshop. It takes a few more steps, but it is still fairly simple.
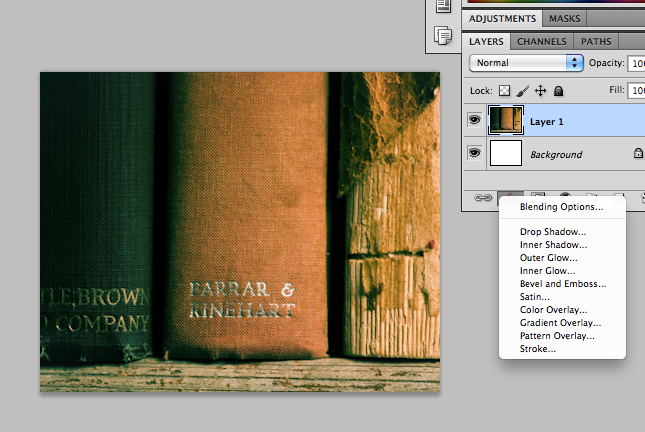
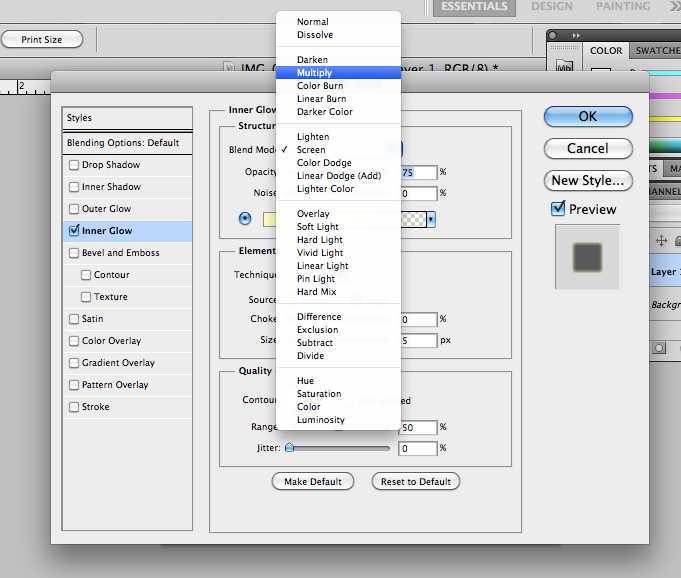
First you must have the photograph you desire to border on a layer apart from your background. You can do this by simply cutting the image out and repasting it. From here, click the fx option on the bottom lefthand of your layers window (it's the one next to the infinity sign looking icon). Once you have the fx window open, you need to check the box to add an inner glow and set the blend option to multiply.
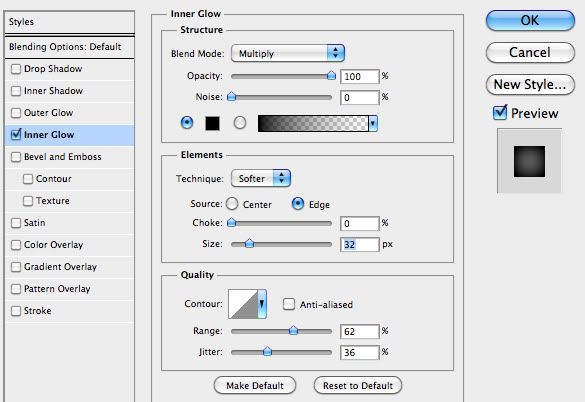
The standard color on my Photoshop is yellow, so I simply changed the color to black, and set my opacity 100. You also want to set the source option to edge. Then simply play around with the choke, size and range options till you figure out a border style you're happy with.
The follow images are my before and after. Although a very subtle change, the border will be a lot more drastic on bright photographs.


I know the images on this post are relatively small, so I set up the images to open in a new window if you click on them!
Hope this helps anyone trying to figure out how to border their images.
3 comments:
Awesome! Thanks for doing this post - I'm definitely going to try this out later today!
Of course! I wasn't sure if you'd check back on the post you asked on, so I thought I'd write about it in a new post as well :]
this is great! I have photoshop though.. what do I need to do in order to get this? (if you don't mind my asking)
Post a Comment